Knowledge Base > Auction How-To’s > Bidding FAQ’s > General FAQ’s > How to Activate Shipping Options for Winning Bidders in Your Auction
Step 1: Navigate to Event Settings
1.1 Start by accessing the auction admin homepage.
1.2 On the left-hand side, find and click on “Event Settings.”
Step 2: Access Design Invoices
2.1 Within the Event Settings, locate and select “Design Invoices” at the top.
2.2 On the right-hand side, you’ll encounter an option asking if you plan to ship any items. Click “yes.”
2.3 Enter the shipping address where the items will be dispatched and save the information.
Step 3: Choose Shipping Options
3.1 Click on “Choose Shipping Options.”
3.2 Pick your preferences to tailor the shipping settings according to your specific requirements.
3.3 Confirm that your shipping is now ready to go.
Step 4: Advanced Features and Item Creation
4.1 When adding items for your auction, pay attention to the “Advanced Features” section.
4.2 Click on “Allow Shipping” to enable shipping details.
4.3 Enter all necessary dimensions and the ZIP code from where the item will be shipped.
4.4 Don’t forget to save your changes.
Conclusion:
By following these step-by-step instructions, you can successfully activate and customize shipping options for the winning bidders in your auction. This ensures an organized and efficient shipping process, contributing to a positive experience for both organizers and participants. For further assistance or clarification, feel free to refer back to this knowledge base article or reach out to our support team.
For Classic:
The shipping options within the CharityAuctionsToday platform vary based on your plan. With a Prepaid Plan, you can opt out of shipping. If you are on the Free Plan, you do not have this option. If the shipping cost is added, all winning bidders will be charged the shipping fee. The directions for each plan are outlined below:
Prepaid Plan:
Step 1) On your auction’s Dashboard, click “Edit Settings.
Step 2) Scroll down until you see “Pick Up Available” and click “Yes.” Then, enter the pick-up address. This will give the winning bidders an option to opt out of the shipping cost and instead pick up the item at the given address.
Free Plan – If you choose a free plan and do not want to apply a flat shipping rate, you can send separate shipping fee invoices after your auction closes. In order to do this, you will create an item labeled “Shipping.”
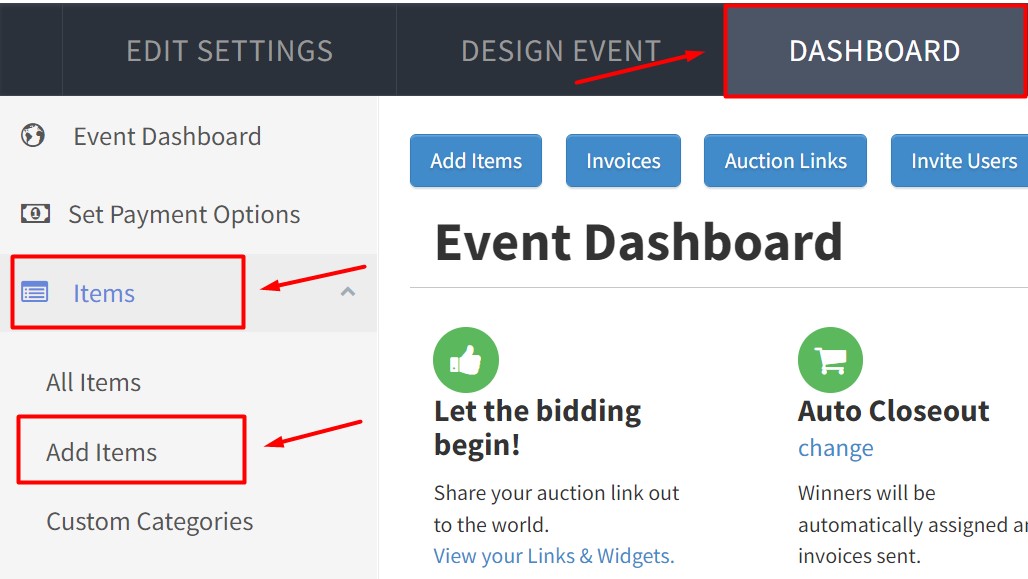
Step 1) On your auction’s Dashboard, click “Items” then “Add Items.
Step 2) At the top of the page, select “View Only” next to “Listing type.” This is how you will separately list shipping within your auction.
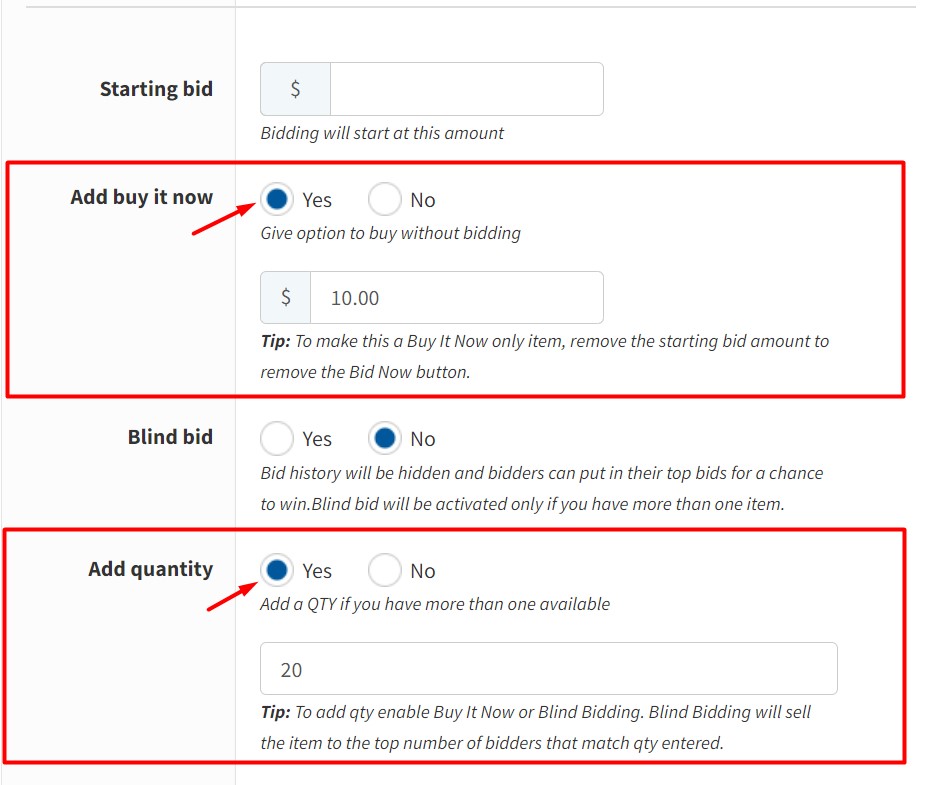
Step 3) Scroll down until you see “Add buy it now.” Click “Yes” and enter a value. This value can be updated and changed before you apply it to the winning item. This value is not the confirmed shipping cost. Add the quantity that will cover the number of items you believe will need shipping.
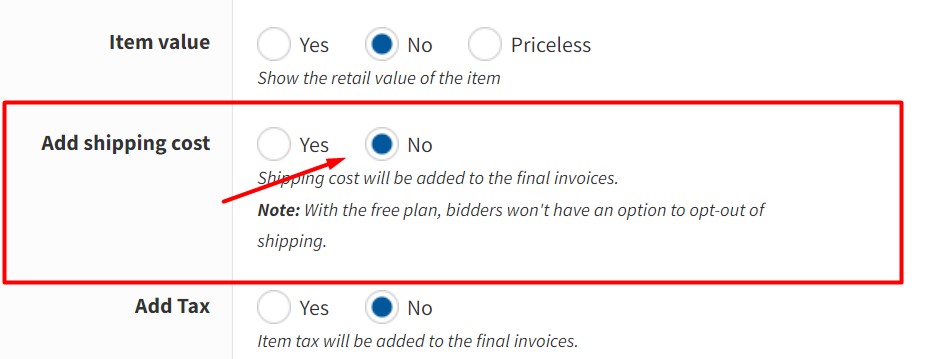
Step 4) Scroll down further, and select “No'”next to “Add shipping cost.
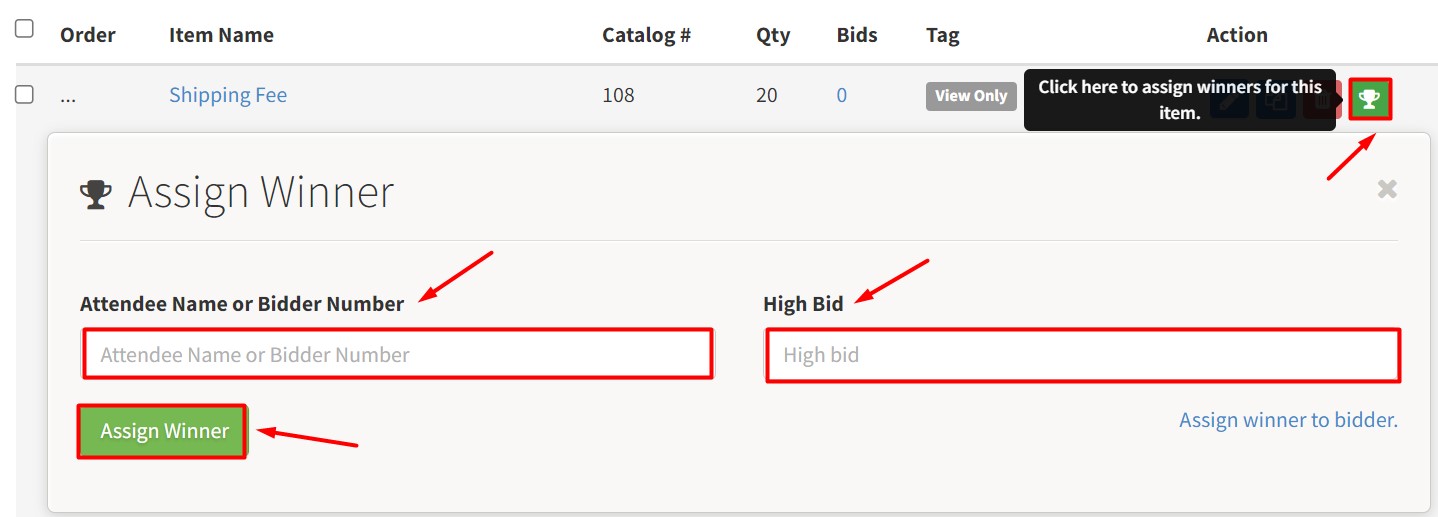
Step 5) Click on the green “Save and exit” button at the top of your screen and return to the “All Items'”tab to view the shipping item. You will see a green trophy to the right. Please click on this to assign a “Winner.
Step 6) Enter the attendee/bidder name and high bid into the appropriate fields. Then, click the green “Assign Winner” button.
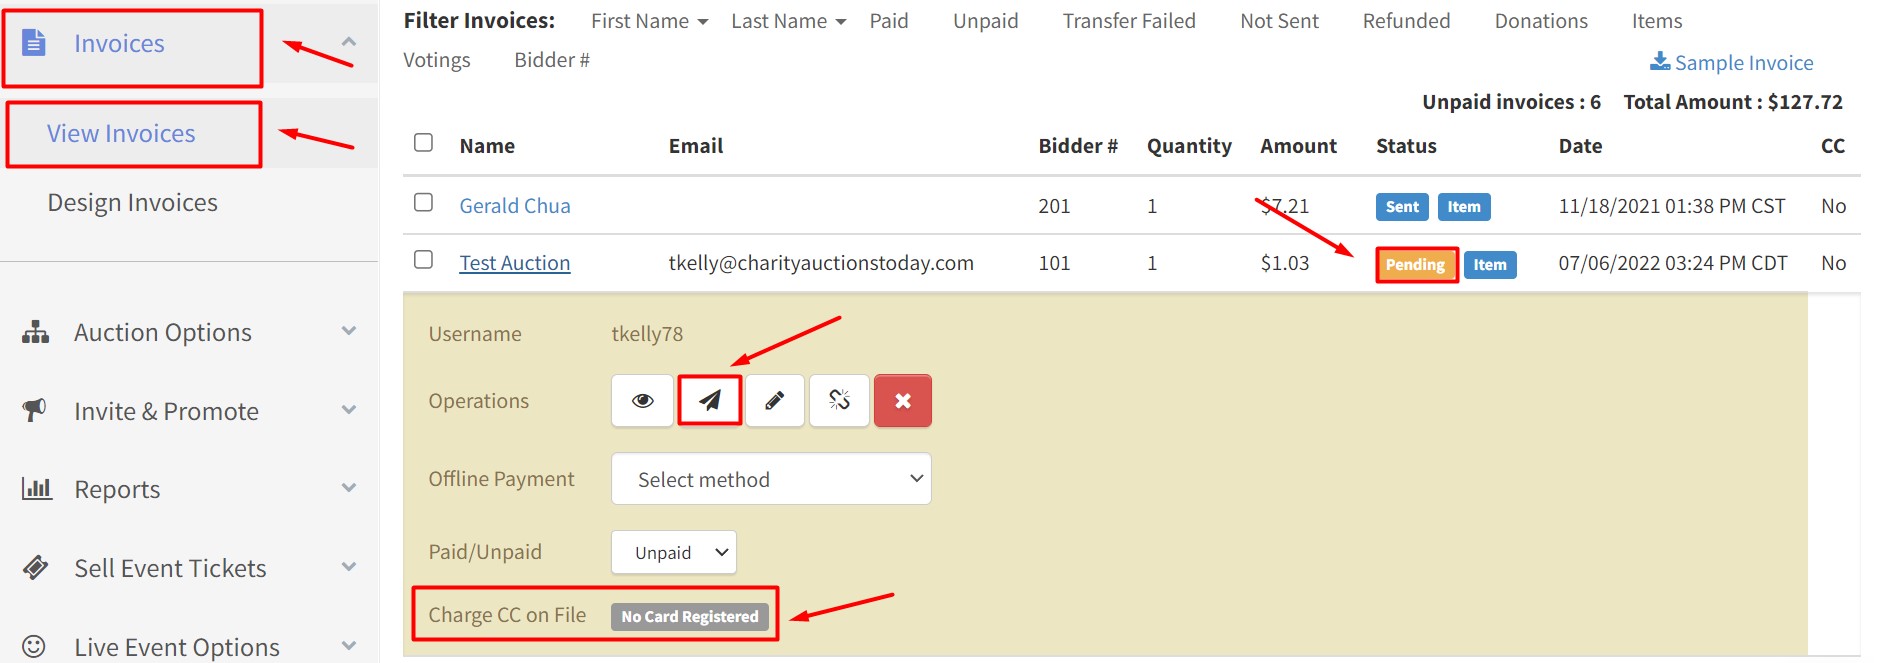
Step 7) Once bidding commences, click “Invoices,” then “View Invoices.” Look for the orange “Pending” tag. These are the invoices attributed to guests with shipping charges. Click “Yes'” to charge the credit card on file, or click the airplane icon to send the invoice to your bidder.
We suggest modifying your auction terms if you plan on charging all cards on file. This way, your winners are aware of the additional shipping charge.
